This article is intended as a reference for anyone who wishes to build a guitar, but does not want to spend a great deal of time or money on the project. Most of the parts can be found at a hardware store. With the exception of a power drill, no power tools are needed, and a dedicated workshop or garage is not necessary -- a kitchen table will suffice (though building a guitar will make a surprisingly large mess).
It is possible to build a guitar in a single day, though it may be better to split the work up over several days.
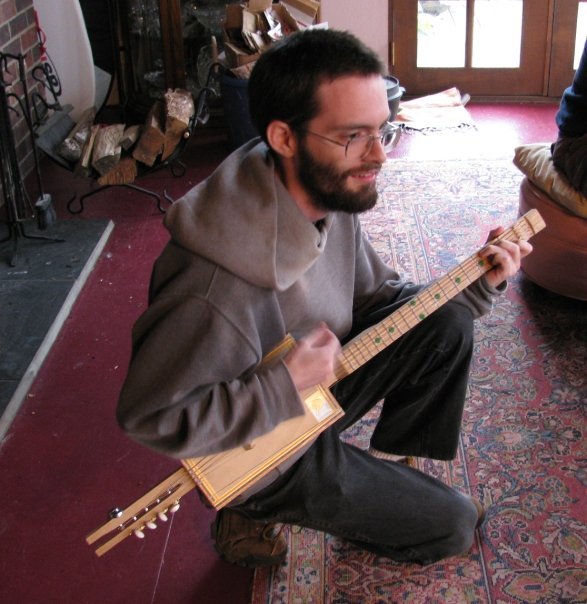
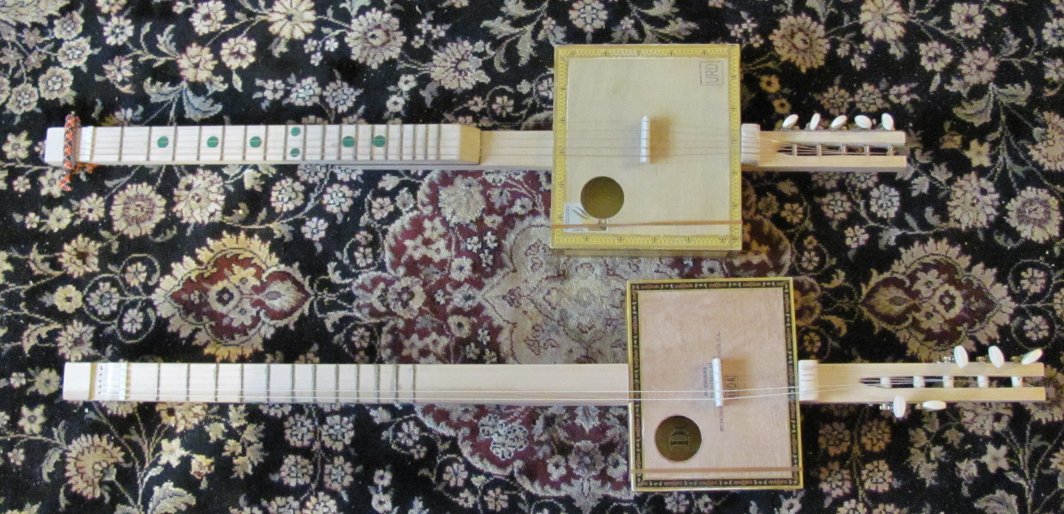
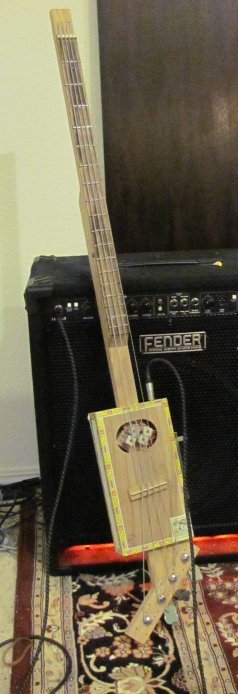
While I have a particular methodology I use, the guitars themselves usually end up all being very different from each other. The pictures shown here are from many different guitars, to give a feel for the variety that's possible. Experimentation is recommended.
I recommend against trying to make everything perfect. You may end up spending a lot of time and effort, only to discover some design defect later. I prefer to think of each guitar as a prototype. By all means, spend time on the things that are important to playability, like leveling the frets and setting the action properly, but don't worry about cosmetic issues. You can always build another guitar, applying the lessons you learn from the first one.
My method of building a cigar box guitar economizes on effort by using standard-dimensional wood. I use 1x2s for the neck (actually 1 1/2" x 3/4"), which happens to correspond nicely with the 1 1/2" length of the 4D finishing nails that I use for frets.
These materials impose some constraints on the design - the neck will be significantly narrower than a standard guitar, and it will not be tapered. The fingerboard will also be flat rather than gently curved, as it is on nicer guitars.
I compensate for the narrow neck by omitting the low E string. This will affect the kind of music you will be able to play, but I find it to be a limitation I can work around most of the time. I once built a guitar with all six strings, but it was difficult to play with the strings so close together.
You will need to make a few decisions before you start building the guitar -- what scale length do you want? How will the tuning pegs be oriented, and which end of the guitar will they be on? Steel or nylon strings?
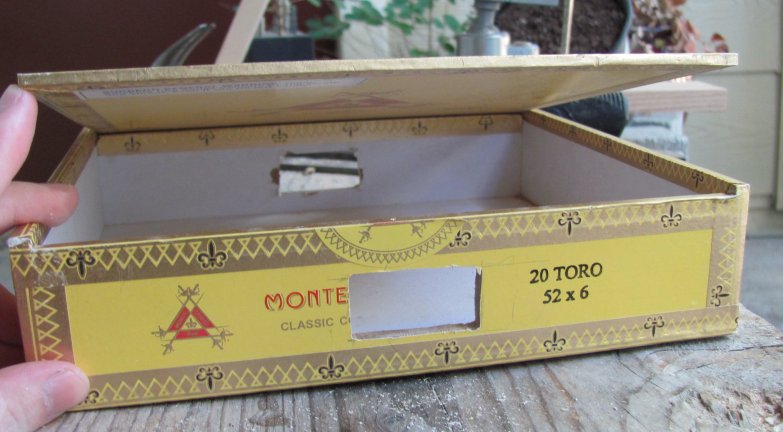
The most frequent question I am asked is where do I get my cigar boxes? Many tobacco shops have extra cigar boxes that they give away or sell for a nominal fee. For some reason, the bottom of the box usually has a better tone than the top. I recommend tapping on the bottoms of cigar boxes with the lid slightly ajar until you find one with a nice loud, clear tone.
Cigar boxes are typically made with spanish cedar, but that's usually only a veneer. The bottoms are usually plywood of some kind, and the sides are often plywood or particle board. Particle board is perhaps easier to work with.
The box will have a little bit of give to it. Nylon strings have less tension, so I recommend those for boxes that are thin and squishy. On the other hand, if you want to build an 8-string mandolin (4 courses of double strings), I'd recommend a very solid box.
For the neck you will need some 1x2s. Originally, I used oak, but the Home Depot near where I live recently started stocking maple, and that's what I'd recommend if you can get it. It's a good idea to have some thinner pieces of wood on hand as well -- 1/2 inch, 1/4 inch, and 1/8th inch -- that are the same width as the neck.
Rosewood makes a very nice fingerboard. I recommend finding a 1 1/2"x1/4" piece that's a couple feet long if you don't mind the extra expense. Small pieces of rosewood aren't always uniform, so make sure it isn't significantly narrower than the neck.
A cheaper alternative to rosewood is to stain the fingerboard. I've used walnut stain on oak, with good results. You'll have to be careful to have the fingerboard exactly how you want it before you stain - you won't be able to file or sand it later without marring the finish.
As mentioned previously, you'll need a box of 4D finishing nails for frets.
Tuning pegs can scavanged off of an old guitar, but it's usually easier to just buy them. The tuning pegs I use are made by Ping, and they're cheap but useable. A set of 6 tuning pegs (3 and 3) costs me about $13 at the local guitar store. They can also special order tuning pegs for a 12 string, which gets you enough tuning pegs for 2 guitars for about $20. Besides cost, another advantage of 12-string pegs is that you get 2 sets of 6 pegs in a row, and they're tightly spaced.
Nylon strings require a different kind of peg than steel strings. The pegs for nylon stings are bigger and they're made of plastic rather than metal. Also, the nylon-string pegs from Ping I've been using have a diameter that is annoyingly just slightly larger than the closest-size drill bit I have, which means a lot of extra filing when it's time to drill holes and install the tuners.
The bridge and nut can be made from wood scraps you have lying around, but you can also use specialty materials like Tusq, which is an imitation ivory. Tusq can come as pre-shaped nuts and bridges, but the cheapest way to go is to buy a large blank and cut it down as desired.
I use Gorilla glue. It expands as it cures, which tends to make a mess, but it's pretty reliable.
Strings are a matter of preference.
Some of the tools you'll probably need:
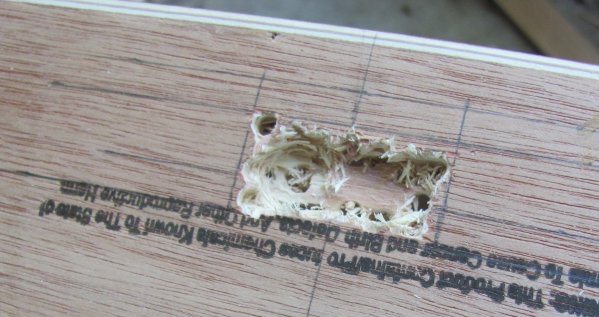
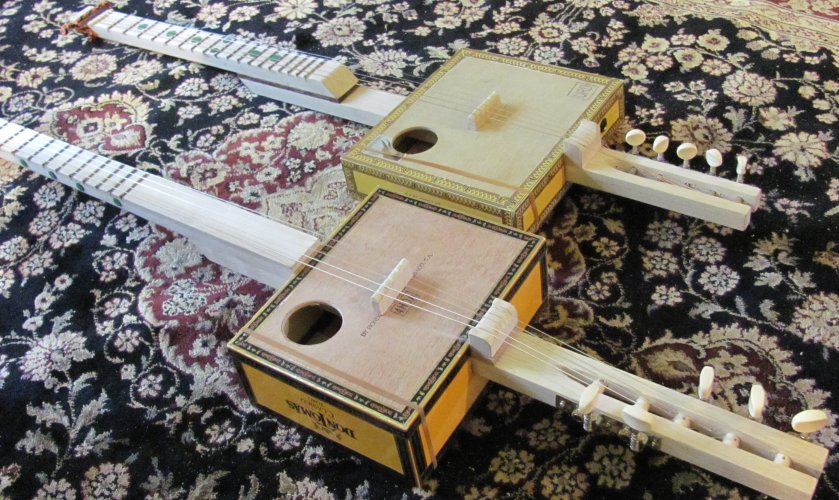
The first thing I do is cut some holes in the cigar box to accept the neck. Unlike most guitars, I find it works well for the neck to go clear through the box and out the other side. This gives you a convenient way to anchor the strings without putting extra strain on the box.
The neck should be close to the soundboard, but not touching it. I usually leave about 1/4" to 1/2" clearance. Plan where to cut your holes accordingly.
You'll also have to decide how to orient the box - should its longest axis be parallel to the neck or perpendicular? This is mostly a matter of preference -- how high do you want the guitar to sit in your lap?
Once I've done the necessary measuring and marking so there's a clear 1 1/2"x3/4" rectangle pencilled in on either end of the box, I use the drill to get the holes started, then use a knife and files until I can slide a 1x2 into the holes.
It's best if there's a tight fit - you don't want the box rattling or sliding around. I prefer not to glue the neck to the guitar if I can help it.
You can cut the soundhole now if you want to -- I usually leave that task for later. Either way, I recommend using a hole saw if you have one. It's best to start drilling the hole from one side, then drill the rest of the way from the other side. This way, you get fewer splinters when it finally cuts through.
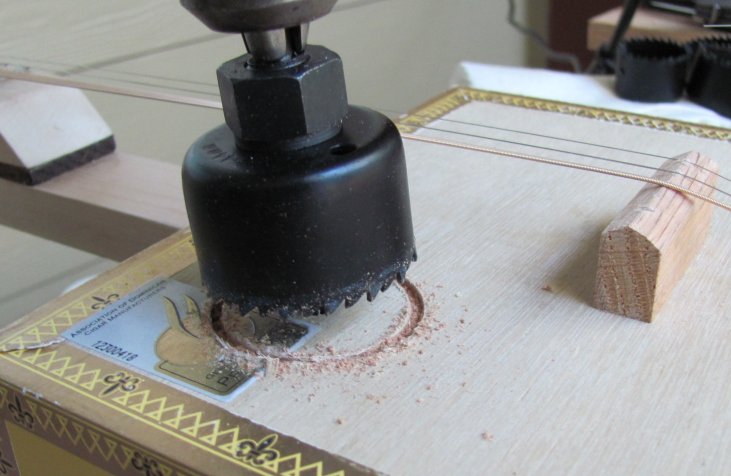
Size and placement of the sound hole is something I don't have any clear advice on. Do be mindful that you don't place it somewhere that will significantly weaken the soundboard. I usually place mine in a corner. On one guitar, I cut the soundhole in the side of the box instead of the top, and that worked out well.
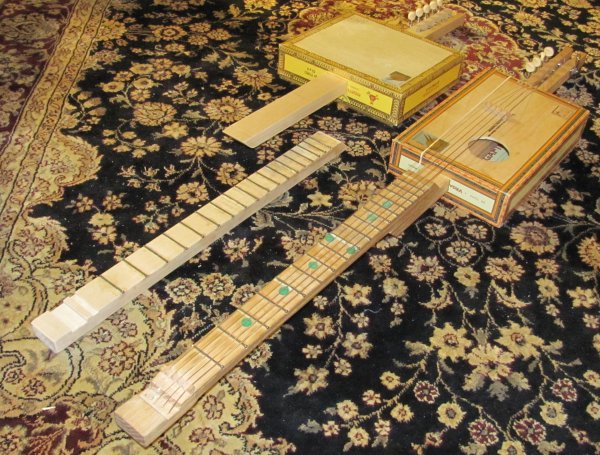
I usually do the fingerboard next. This is the most complicated part, but the work tends to go quickly.
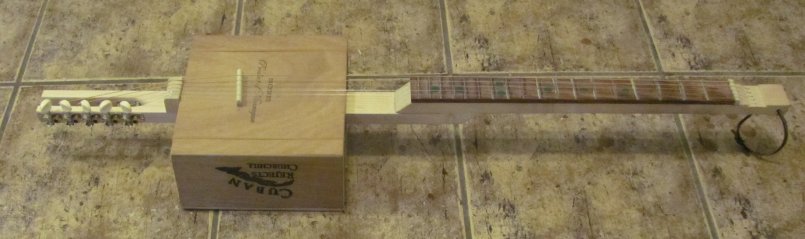
The neck I usually build in two pieces, glued together offset so the fingerboard is higher than the top of the soundboard. I will call these two pieces the upper neck and the lower neck. You will need to decide whether to attach the frets directly to the upper neck, or if you will thicken the neck with another layer of wood. Either way, you will need to cut the neck pieces to an appropriate length.
Most of my guitars place the tuning pegs on the opposite end as they normally appear. The advantages are that the weight of the pegs balance out the neck, the neck is thinner, and less wood is needed. If you prefer tuning pegs in their traditional position, I recommend making the lower neck run the full length of the guitar, and then making the fingerboard out of a thinner piece of wood.
Sometimes the upper neck has a slight warp to it. In that case, I orient the neck so the string tension will counteract the warp. If the lower neck is warped, it won't make a big deal one way or the other.
The length of the upper and lower neck pieces is something you'll have to decide for yourself - there is not right length, though if it's too short you'll run into problems later. Better to make both pieces too long. Make sure you leave enough room for the tuning pegs.
You will also need to determine the placement of the nut and frets. The easiest way to do this, is to take an existing guitar and copy the fret placement. I prefer a shorter scale length than a standard guitar. One way to do this is to copy a short scale length guitar, but you can also treat the first or second fret of a standard guitar as the nut location and copy from there.
Keep in mind that if the scale length is very long, you may have trouble finding strings that are long enough.
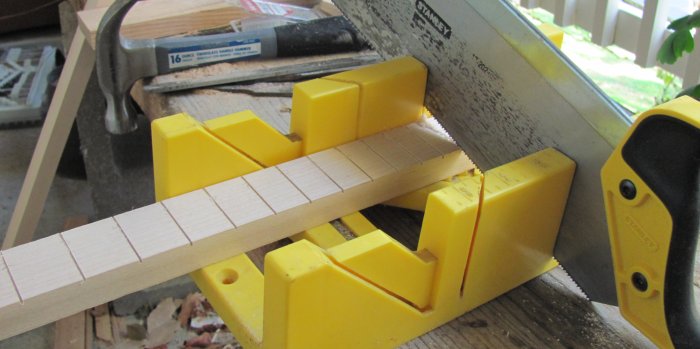
Once you have your fret locations marked on the fingerboard, put it in the miter box and use a handsaw to cut a shallow grove for each fret. It need not be very deep, but it is important to finish sawing each grove without moving the wood, otherwise you'll end up with an extra-wide grove, which will cause the fret to sit lower than it should. This is harder to correct than a high fret.
I usually install 12 or 18 frets. The small sound box means you can play farther up the neck than most guitars, so where to stop depends on how you want to play the instrument when it's done.
You don't have to cut a groove for the nut, but I usually do. I also cut a second groove next to it and hollow it out with a chisel, so the nut has a recessed spot it can rest in.
Glueing the frets is a repetitive task, but it doesn't take very long. I use Gorilla glue, which means you'll need to get the wood lightly damp first (and probably again, unless you work fast).
I use 4D finishing nails. I glue them with the head on top and the points down. If you don't want to catch you fingers on the sharp ends, I recommend filing the points down first before you glue them on. (Filing them afterwards is a lot harder, as you're likely to knock them loose, and then you have to glue them again.)

I also take a triangle file and file a notch in the end of each groove to accept the head, so the nail can lie flat.
Once you've got your grooves ready and your frets prepared and you wood damp, put a thin line of glue down each groove, and set each fret in place. It'll take about 45 minutes or so for the glue to dry, and you'll want to check in periodically. The glue expands as it cures, which tends to lift the frets. If you're careful to press them back down, you'll have a more level fingerboard.
In the end, the fingerboard is unlikely to be perfectly level. An uneven fingerboard will cause some notes to buzz if you set the action low, and for playability, you'll want the action to be as low as you can get away with. You can correct for some pretty significant unevenness with a big, flat file. Be careful not to file too vigorously - metal expands as it heats, and you're likely to break glue joints if the frets get too hot. Freshly-filed steel is very shiny, so it's easy to what's getting filed and what isn't. I usually stop when all the frets are shiny all the way across - this means there aren't any low spots left.
If any of the frets comes loose, you'll have to glue it back on (preferably in the same orientation so it will be almost level), and then file it back down so it's even with its neighbors.
At this point it's time to glue the upper and lower neck together, and if the fingerboard is a separate piece you'll want to glue that on too. I use Gorilla glue here as well. Don't use too much, or you'll make a mess. Clamping the wood is a good idea.
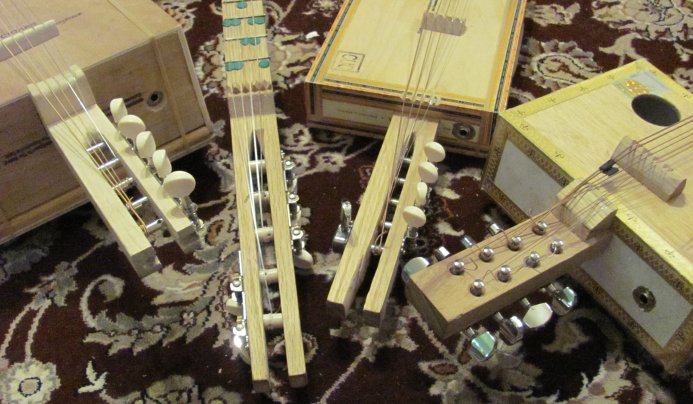
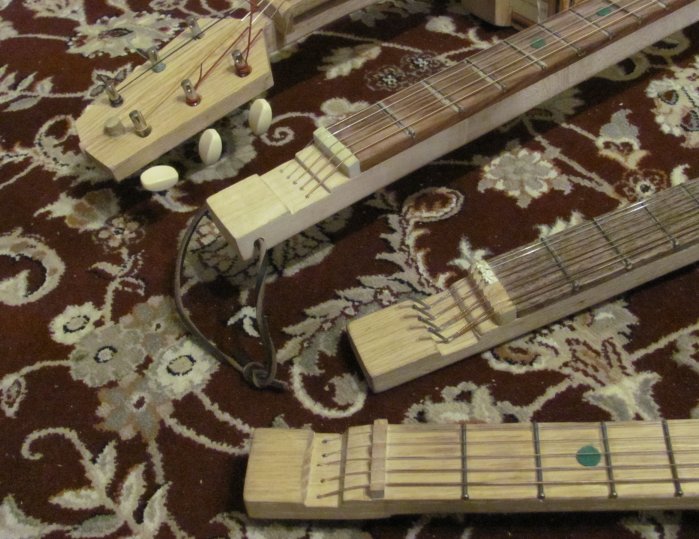
The tuning pegs (i.e. machine heads) can be installed on either end of the guitar, as noted earlier. Either way, you have a couple of options. The easiest is to just drill the required holes and slip the tuning pegs in from the back, with the pegs poking out the front in two rows like on a typical acoustic guitar a single row like many electric guitars.
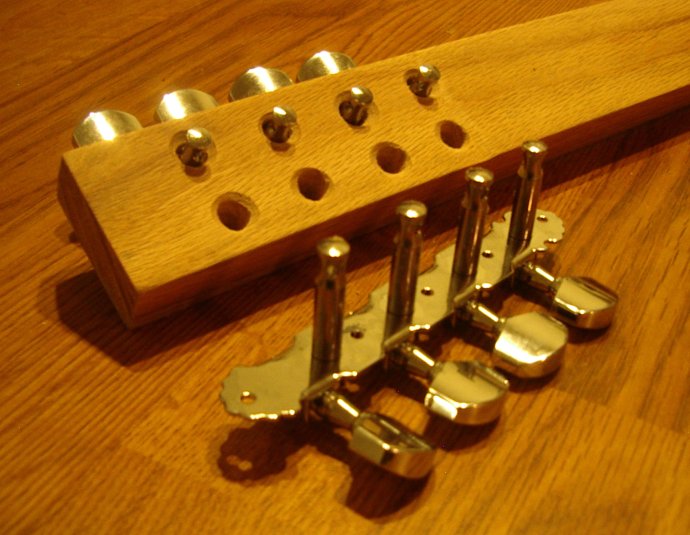
Another option is to make a wide cut down the middle of the neck, creating a two-prong fork, then drill holes to accept the tuning pegs from the side. This is similar to a classical (nylon string) guitar, though classical guitars usually have two parallel rows of pegs instead of one.
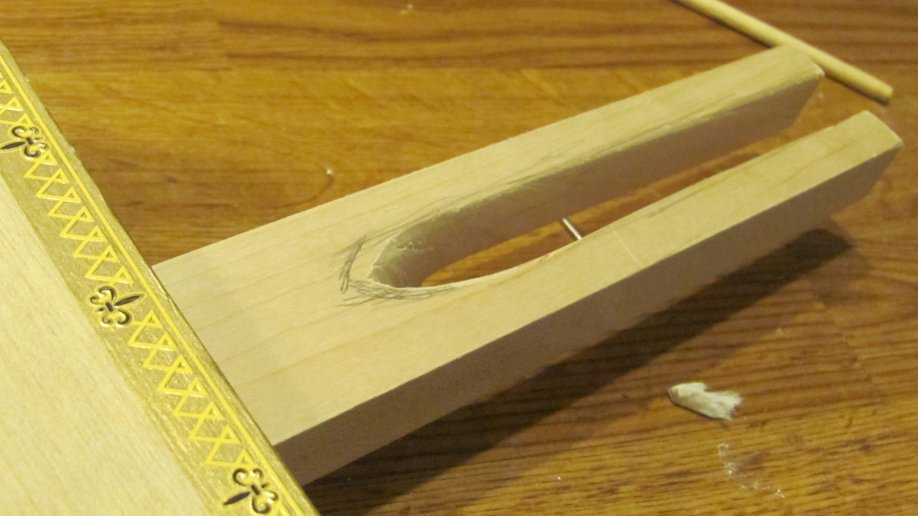
Cutting out the fork can be a lot of work, if done by hand. A band saw can save time here. Make sure you pay attention to where the holes are drilled in the tuning pegs to accept the strings, and place your cut appropriately.
Using tuning pegs from a 12-string set pays off here if you choose the latter route, as the pegs are closely spaced, and you can have 5 tuning pegs in a row without adding excessive length to the guitar. You can cut the extra peg off with a hacksaw.
If you use a set of pegs for a 6-string, you can put two pegs on one side and three on the other. The two sets are mirrors of each other, so it works well to have some on one side and some on the other. (For 12-string sets, this means your next guitar will have the knobs on the opposite side of the neck, or you could install the tuners backwards. )
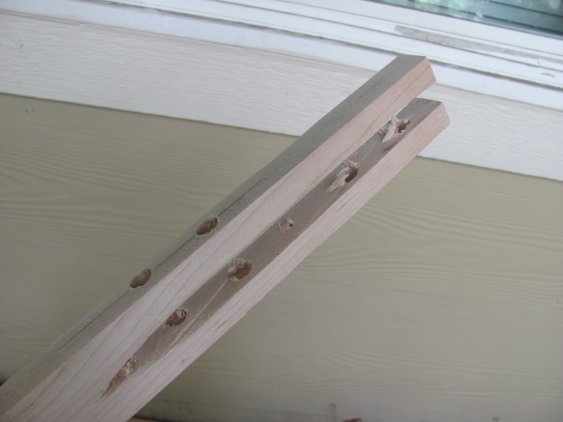
Drilling the holes for the pegs is tricky. This would no doubt be easier with a drill press, but it can be done with a handheld electric drill. I recommend using a pencil to poke an indentation in the wood where the holes should be. I prefer not to drill the holes all the way through both sides, but you will have to drill at least a little ways into the far side. If any of the holes are off-center, you'll have trouble installing the tuning pegs. You can remedy this with a round file. Once the tuning pegs slid in easily, and the knobs turn without excessive friction, you can drill the smaller holes for the screws.
If your tuning pegs are on the non-traditional end, you will at this point need to slide the sound box onto the neck before installing the tuning pegs. (It's usually easier to leave it off while drilling the holes.) To keep the lid from flapping open, you can use rubber bands. High-quality rubber bands can be found at hobby stores that sell radio controlled planes -- they use them to hold the wings onto the fuselage. I recommend spending a few dollars and buying a box, you'll have a lifetime supply of remarkably durable rubber bands.
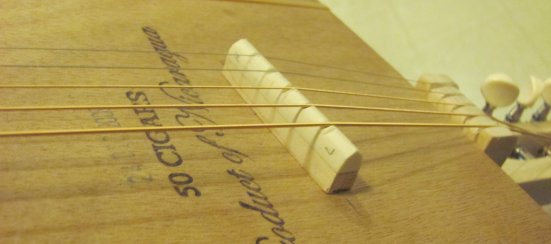
The bridge is the part that connects the strings to the sound board. It can be made of wood, or metal, or most anything you have lying around. There are a few points to consider, though.
You'll want something lightweight that transfers the sound well. I usually use a scrap of maple glued to a strip of tusq which contacts the strings. You'll probably want to file a notch for each string, so they don't slide around. It's important that the strings be supported at a sharp point, otherwise you may get false notes or buzzing.
Steel strings will need some compensation if you want them to sound in tune. In practice, this means that the B string will need a longer speaking length than its neighbors. You should shape the bridge accordingly.
I don't glue the bridge in place. Rather, I let string tension hold in in the desired spot. This means that you don't have to have an exact idea of where the bridge needs to go. It's good to have a general idea, though. I put the bridge close to the middle of the sound board, but most cigar box guitars I've seen place the bridge close to the far edge.

The considerations for the nut are similar to those for the bridge. Make sure the strings are supported at a point as close as possible to where you originally marked the nut location.
You may at this point file grooves in the nut to accept the strings, but don't make them too deep until you intall the strings. Most guitars have a tapered neck, so that the strings are much closer at the nut than the bridge. Even without a tapered neck, the strings don't need to be exactly parallel. Wider spacing between strings at the bridge will make the guitar a little easier to play.
You will need to drill some small holes in the neck to anchor the ends of the strings. Steel strings have a ball on one end, and some nylon strings do as well. (For the ones that don't, you can tie a knot in one end.) Thus, all that is needed to anchor the end of a string is a hole large enough for the strings and small enough to keep the ball (or knot) from slipping through. You will need to drill the holes on the opposite end of the guitar as the tuning pegs. They will either be placed in the upper neck just past the nut, or on the lower neck past the sound box.
Strings are installed similar to most steel guitars. Just slide the string into the tuning peg, leaving yourself a couple inches of slack, and kink it so it forms a "Z", then tighten it up.
Sometimes I insert a spacer under the non-speaking length of strings between the bridge and where the strings are anchored. This reduces down-pressure on the bridge (in my experience, it doesn't take much down-pressure to produce reasonable volume and tone) and prevents the strings from chewing up the edge of the box.
After strings are installed, there's still quite a bit of work to do before the guitar is ready to be played, and it's important not to skip this if you plan to spend any time playing the instrument.
The bridge and nut will both need to be carefully adjusted so that the strings are as close to the frets as they can be without buzzing. It is important, though, not to go too far -- it's a lot easier to adjust the action down than to adjust it back up.
I use triangle files for filing down the grooves in the nut. This leaves wide V-shaped grooves, which may look a little odd but it works. For the nut, you'll want to lower the action until each string only moves a little bit when you press down at the first fret. If you go to far, you'll hear buzzing when playing an open string. If this happens, you can fill in the groove in the nut with superglue.
For the bridge, once you've got the compensation figured out, you probably don't want to mess with the top of the bridge, so I'd recommend filing it from the bottom with a flat file. If the frets are all even, you can bring the strings down surprisingly low without any problems. I recommend finding a guitar that has been set up well, and comparing the action.
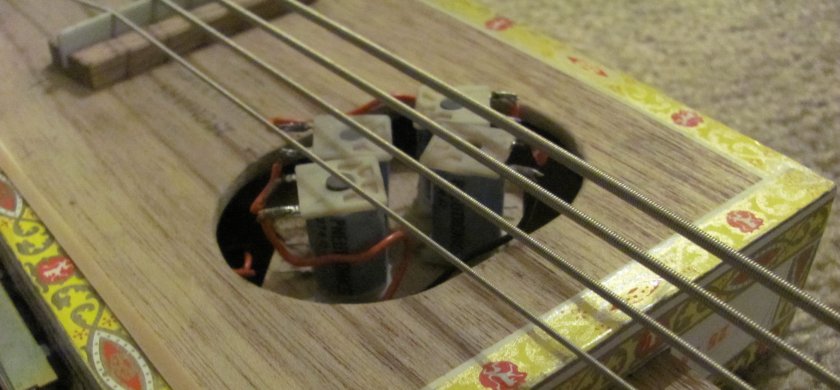
Many acoustic guitars have under-saddle piezo pickups and built in pre-amps. These tend to be expensive. A different kind of piezo pickup attaches directly to the soundboard and senses soundboard vibration rather than string pressue. These are usually much cheaper, and that's the kind I use.
Any piezo buzzer can also work as a piezo sensor, but many piezos that aren't designed to be used as a sensor have resonant frequencies within the audio range that greatly amplify certain tones (usually in the high treble). I've had better luck disassembling tuner pickups. Tuner pickups aren't meant to be listened to - they just clip onto the headstock of a guitar, and you plug them into an electronic tuner. The ones I have tried, though, sound remarkably good. I recommend the Signal Flex SF-20, which can be had for about $10. It has a plastic housing with a suction cup and a guitar cord. You'll want to take a knife and pop the plastic housing open, remove the piezo, and cut off the guitar cord (leaving about 6-8" slack).

You'll also need a female guitar jack to install in your guitar. Usually, the walls of the cigar box are too thick to accomodate the threads on the guitar jack, so you'll have to do some creative drilling to reduce the wall thickness where you install the jack.
Even mono plugs often have 3 connectors. One is for the signal, and the other two are ground. (Unless it's a stereo plug, then one of the other connectors may also serve as the other channel.) When you install a mono plug, it closes a circuit between the two ground connectors. This way, inserting a cord functions as an on-off switch. (We don't need to use it as such, but it may come in handy for battery-operated pre-amps or active pickups.)
At this point, you can strip the ends of the wires on the piezo, and solder them to the guitar jack signal and ground. (As far as I know, it doesn't matter which ground. I'm not sure if polarity matters, either.)
I use superglue (i.e. CA) to glue the pickup to the soundboard. It's a good idea to plug the guitar into an amp and experiment with how the tone sounds before finding a spot and gluing it down.
Sometimes, I use two pickups and attach them to a stereo jack.
Piezos tend to have strong trebles and weak basses. If you want to run the guitar through a home theater sound system rather than a guitar amp, I recommend using the phono input if you have one.
Magnetic pickups can also be used on cigar box guitars. If you are using acoustic (i.e. copper-wound) strings, then you'll be better off with a "sound-hole" pickup designed for acoustic guitars. If you have steel strings, then any pickup for electric guitar should suffice. You'll need to install a guitar jack and solder the pickup output to it.
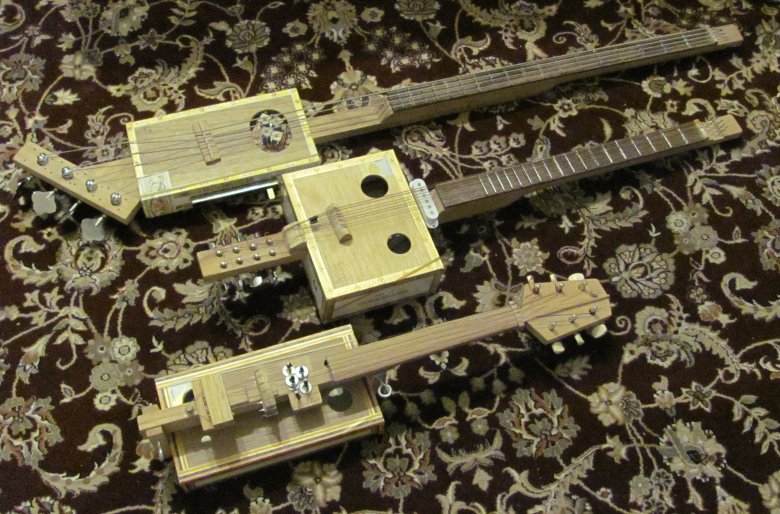
Many other instruments besides five-string guitars can be made in like fashion.
I have built one electric bass so far. It uses a cigar box for its body, though it may have been better to just use a solid body. The design considerations for a bass are that it will be much longer and heavier, and the strings have more tension. The tuning pegs are also a lot bulkier and more expensive. Strings are more expensive as well.
I made my own pickups out of solenoid cores, using nails with magnets stuck to them as poles. I also installed a piezo.
The home-made magnetic pickup has a lot of hum, but it's playable. I've also used an EMG HA active guitar pickup on the bass, and that works very well.
Mandolins are tuned like a violin, with each course a perfect fifth (7 semitones) apart from its neighors. (Mandolins have 4 courses of 2 strings each, for 8 strings.) Octave mandolins are an octave lower in tone, and have a scale length similar to a guitar. I have built an octave mandolin, and was happy with the result. It has a magnetic pickup taken from a cheap electric guitar, and a piezo. I have found that a 1 1/2" neck is wide enough to reasonably accomodate 4 courses of strings.
Mandolin strings typically have loops ends rather than ball ends, so you may need to anchor them differently than guitar strings.
So far, I haven't been able to sucessfully build a bowed instrument that I've been completely satisfied with. The methods presented above aren't compatible with a curving fingerboard, which is necessary in order for the bow to reach more than 2 strings.
Violins come with their own challenges. An easily-overlooked consideration is that the violin should have a proper chin rest and not be too heavy.
Strings are important - guitar strings just don't sound right with a bow.

Nearly all modern music is written according to a 12-tone equally tempered scale, which divides the octave into 12 notes evenly spaced (logarithmically, rather than linearly). The 12-tone scale works remarkably well, but there are a couple other scales that aren't bad, either. Two popular variations are 19-tone and 31-tone. You probably won't be able to copy an existing guitar, so you'll have to do some math. The easy way is to find the formula for fret placement on a standard guitar. Somewhere, the 12th root of 2 will appear. Replace this with the 19th or 31st root of 2.
I recommend using a long scale length with a 31-tone fingerboard, to give yourself a little bit more room between frets.
Fan frets are frets that aren't parallel with each other. Traditionally, they're used to achieve a wider range of tone between the bass and treble - the low string can have a longer scale length than the high string. My experience is that they look good, but from a practical point of view they aren't worth the trouble. Figuring out where to place the frets is actually not very hard - you just mark one edge of the finger board with fret placements for a short-scale guitar, and mark the other edge with a fret placement consistent with longer-scale guitar, then connect the dots. If you use nails, you'll need to cut off the ends with a hacksaw, as they won't all be the same length.
If you have read this far, then I hope you have built yourself a great instrument that will last you for years, or until you build your next one.